How to Set Up an eSIM on Android Devices
Follow these steps to set up your new eSIM on your Android device easily.
Before You Begin
- Make sure your Android device is eSIM compatible
- Ensure your Android device is carrier unlocked
- Have a stable internet connection available
- Check with your local carrier to confirm WiFi Calling is available in your region before making a purchase.
Installation Methods
** Please be aware that eSIM can only be installed once. You should perform the installation under stable network connection and do not interrupt the installation process. Once installed, do not delete your eSIM after installation.
You can install your eSIM using either a QR code or manual entry:
(1) Access your eSIM details
- Log in to your account on App or Website
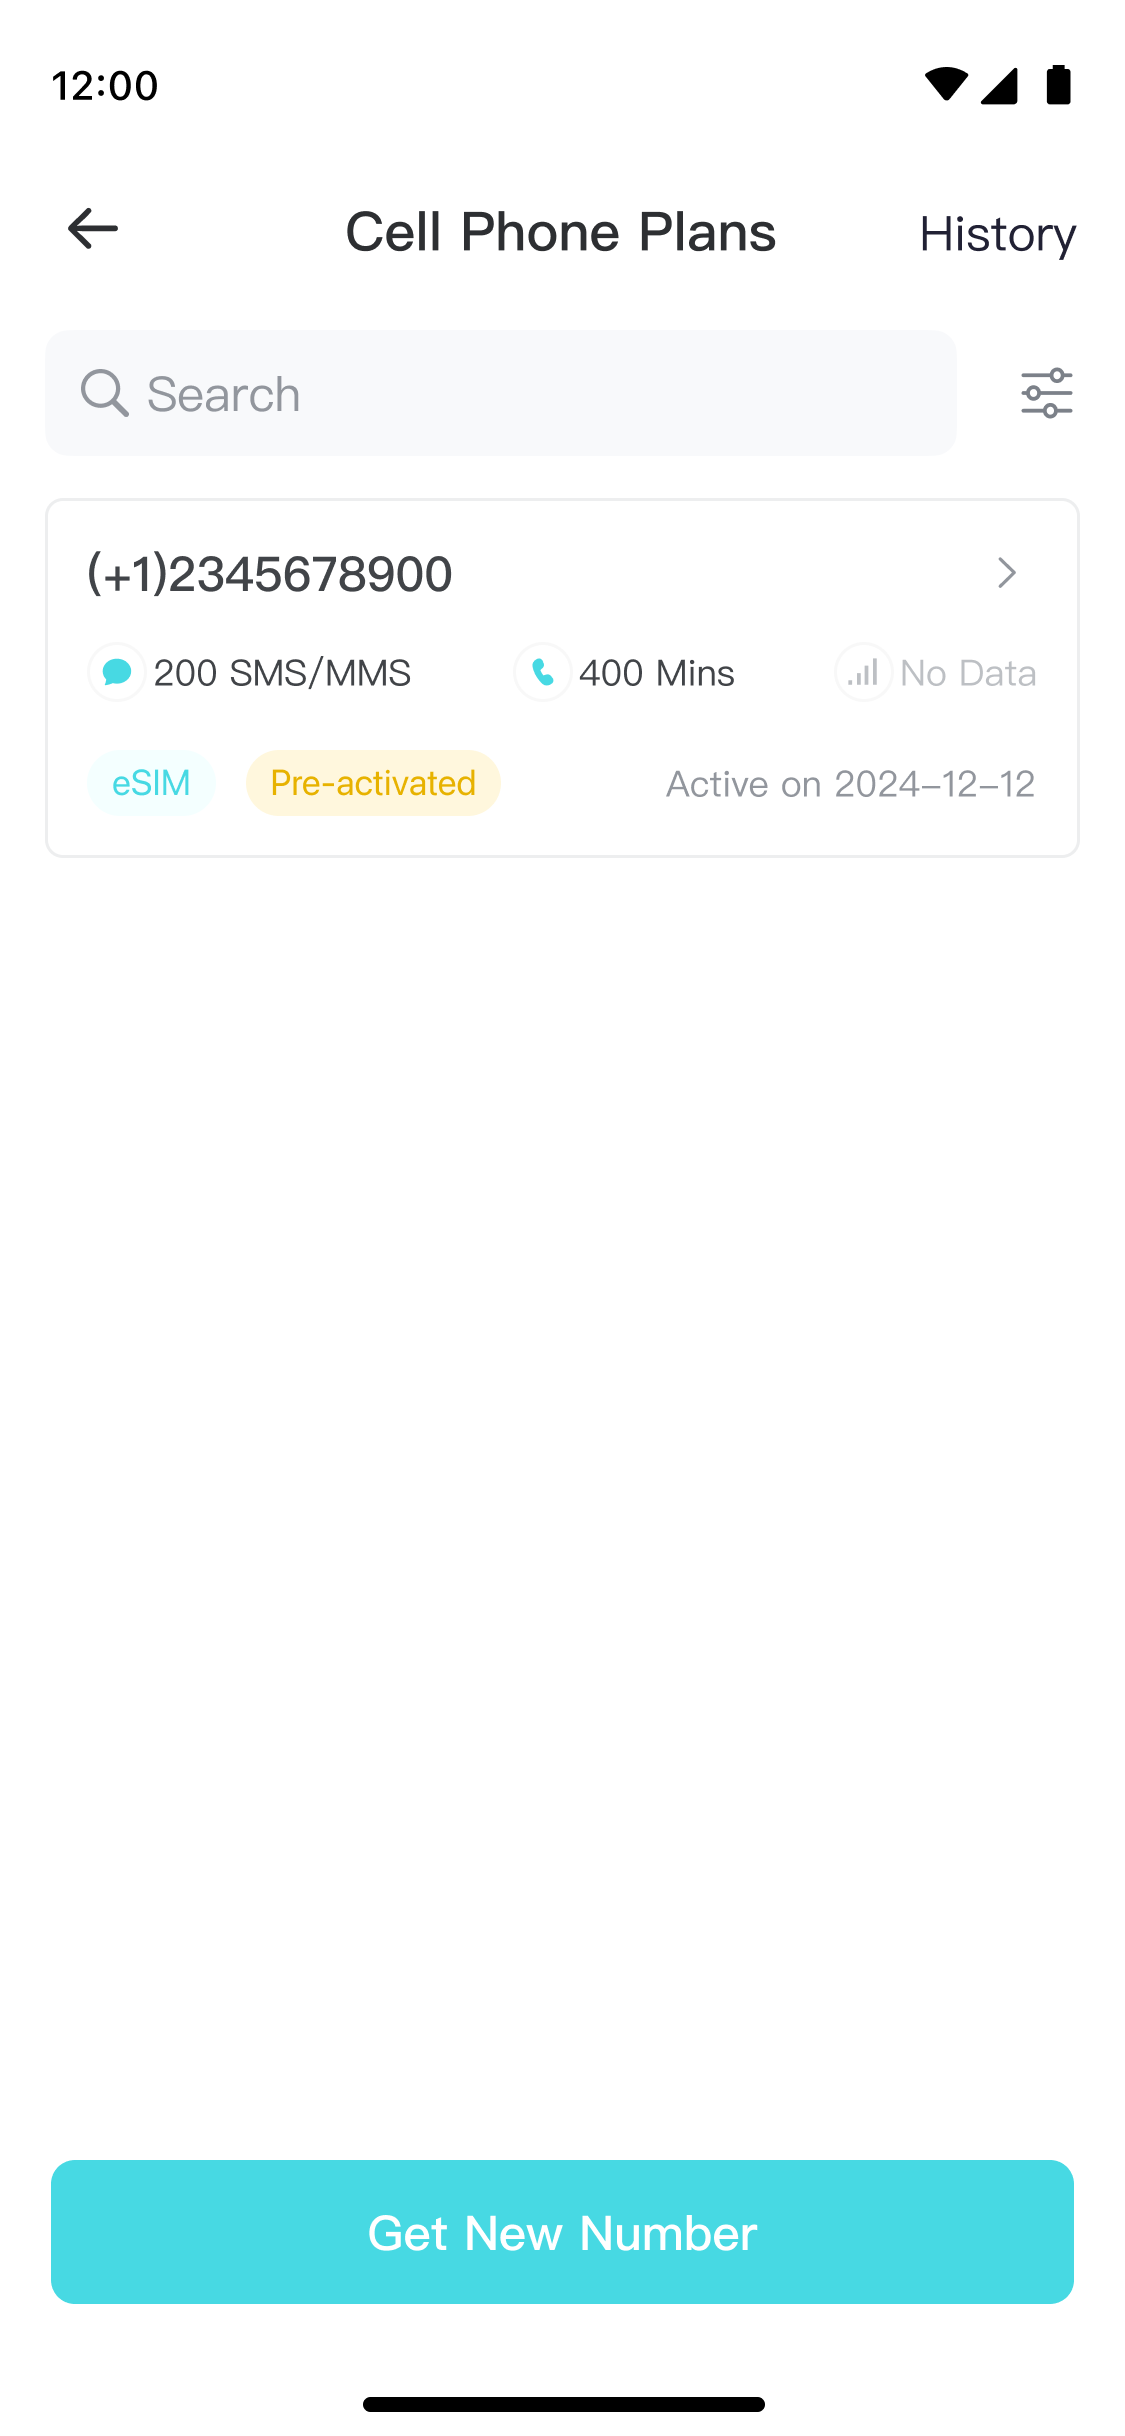
- Go to Number > US Cell Phone Plan
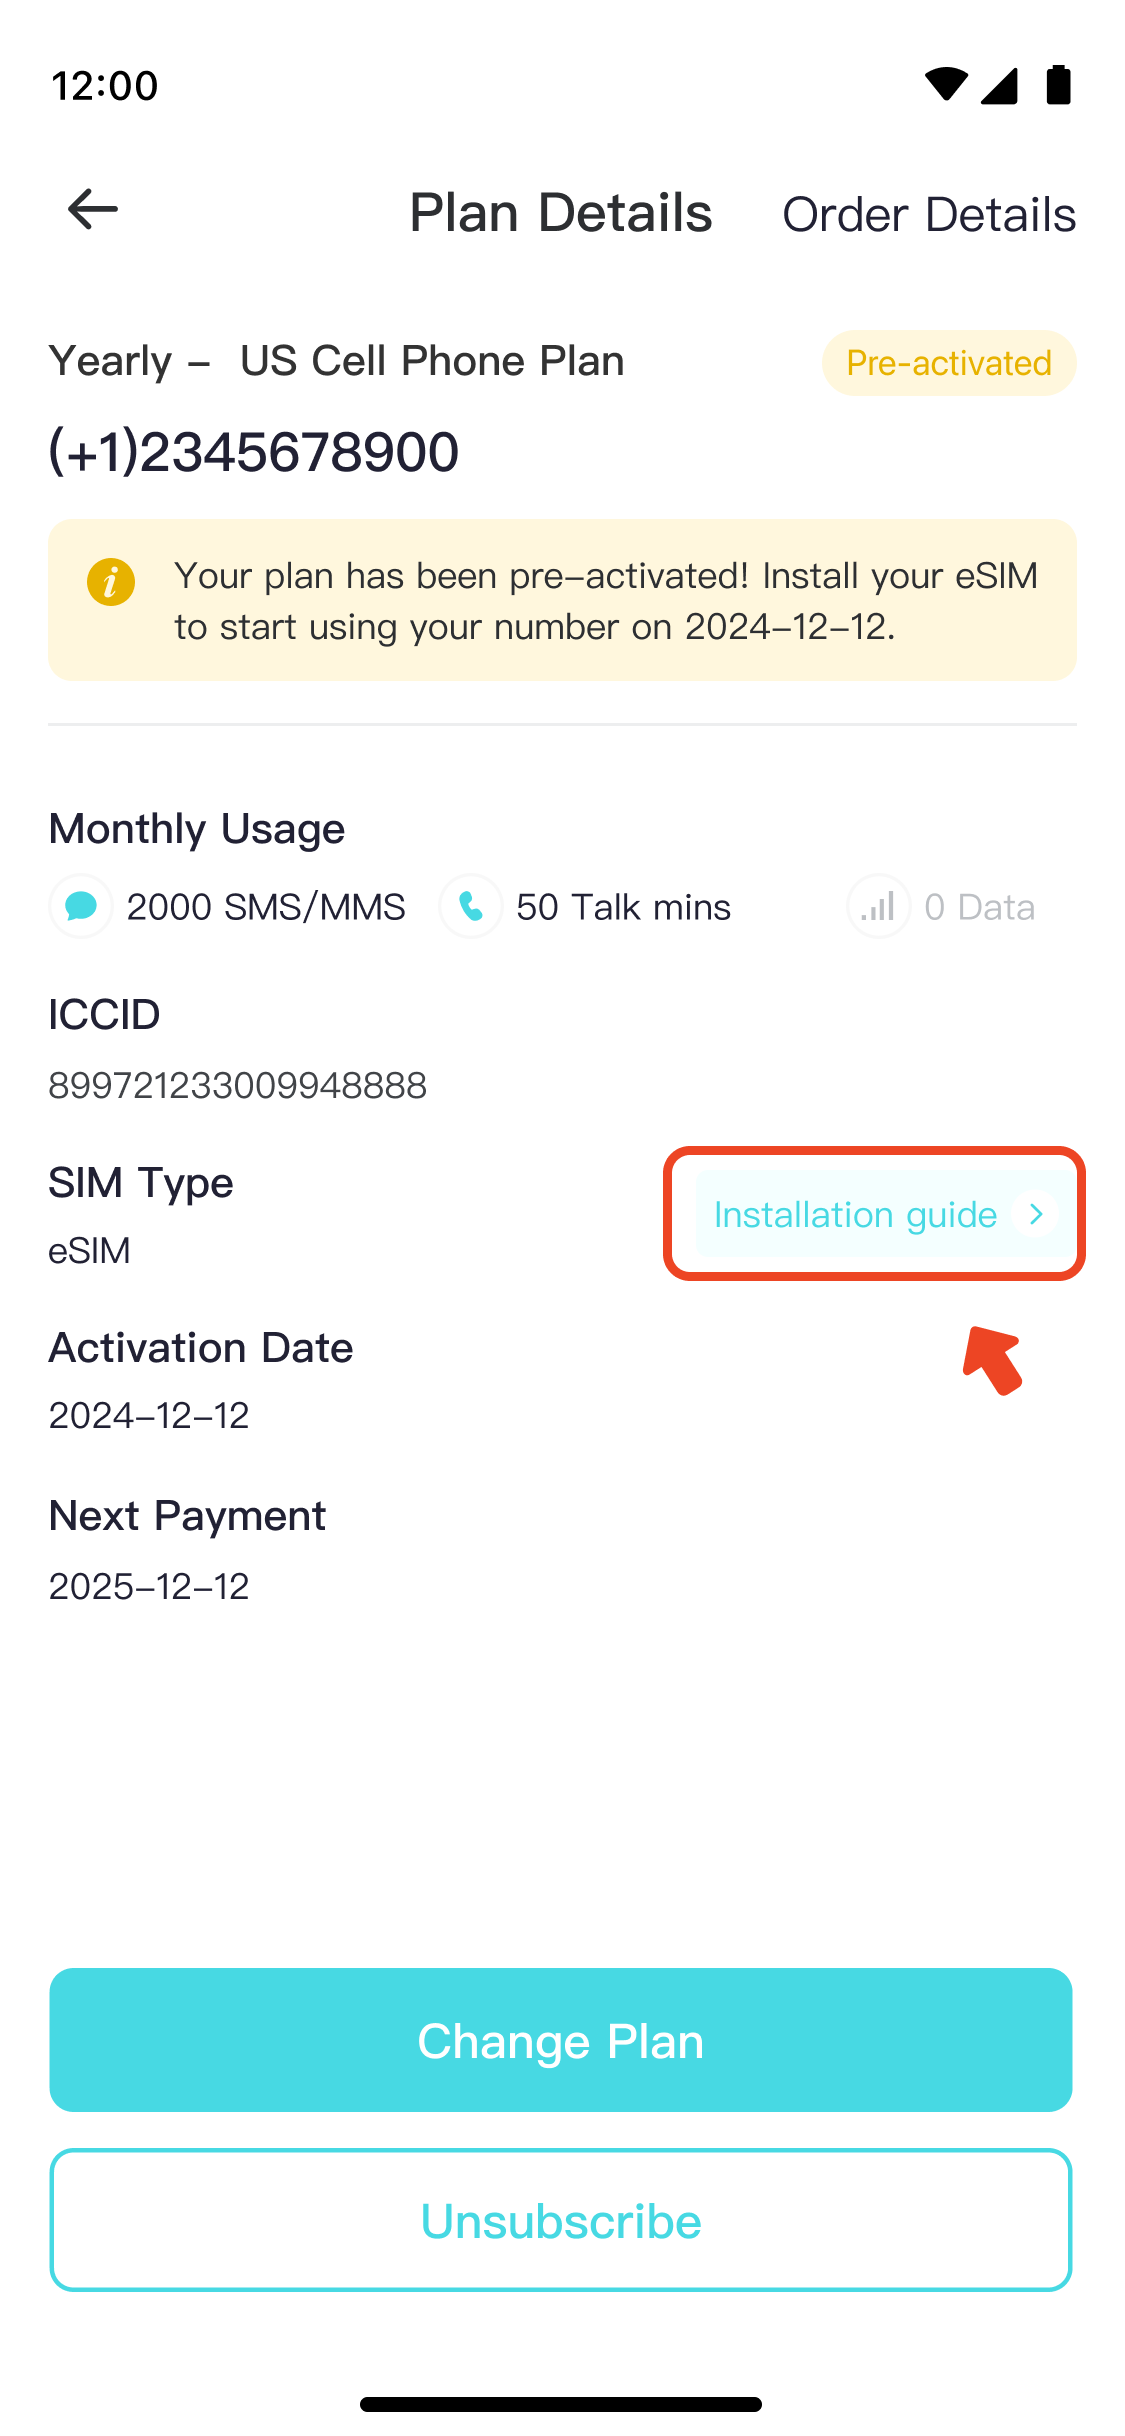
- Select your plan
- Click Installation guide under SIM Type
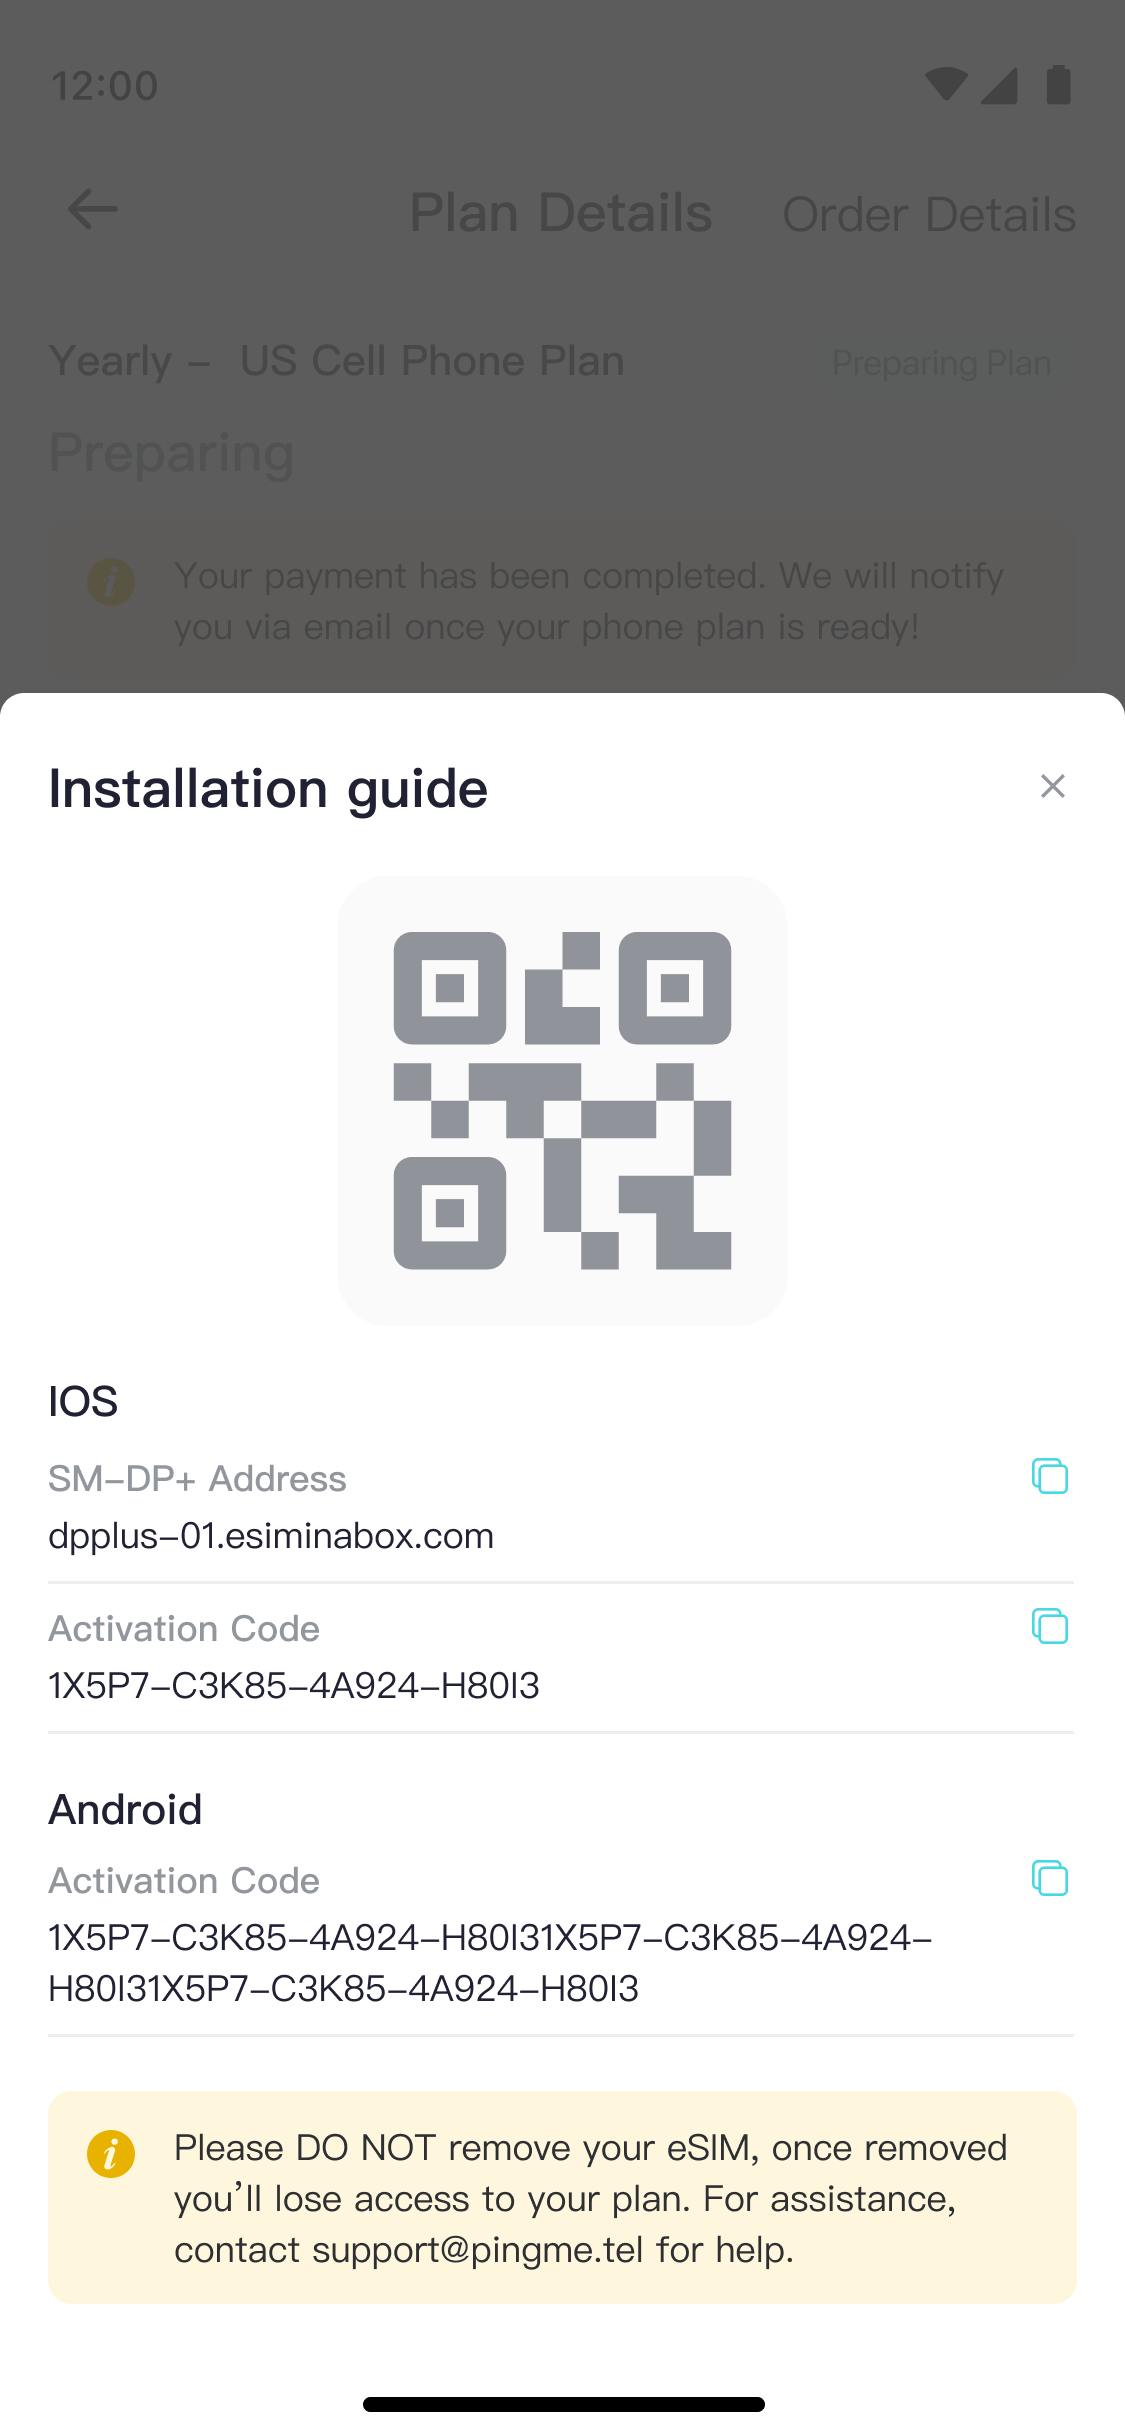
- Get the Installation QR code
(2) Install on your Android Device
- Option 1: QR Code Installation
- Go to Settings > Network & Internet > SIMs > + Add SIM
- Select Download a SIM instead
- Tap Next, then select Scan QR code from network
- Scan the QR code (displayed on another device or printed)
- Tap Download when prompted
- Wait for installation to complete (may take a few minutes)
- Option 2: Manual Installation
- Go to Settings > Network & Internet > SIMs > + Add SIM
- Select Download a SIM instead > Next
- At the Scan QR code from network screen, tap Need help?
- Select Enter it manually
- Enter the SM-DP+ Address and Activation Code from your installation guide
- Tap Continue, then Download
- Wait for installation to complete (may take a few minutes)
Final Setup
(1) Label your eSIM
- Go to Settings > Network & Internet > SIMs
- Select your newly installed eSIM
- Tap the pencil icon to rename it
- Enter a name that helps you identify this plan
- Tap Save
(2) Activate your service
- Go to Settings > Network & Internet > SIMs
- Select your newly installed eSIM
- Toggle Use SIM to activate
(3) Enable WiFi Calling
** In some countries and regions, WiFi Calling is not supported due to local policy restrictions. Users should verify with their carrier before making a purchase.
- Navigate to Settings > Network & Internet > Mobile Network > Advanced
- Toggle on WiFi Calling
- Complete the emergency address information if prompted. In most cases, you won’t need to enter this information again as we’ve already registered your emergency address during the activation process. If you are prompted to enter it again, please use the same address you provided to us initially
- Tap to confirm
(4) Verify WiFi Calling is working
- Connect your device to a reliable internet network
- Look for the WiFi calling indicator in your status bar
- Place a test call or a test message to a US phone number to confirm functionality
- If successful, calls will route through WiFi instead of cellular
Your eSIM is now active! Stay connected effortlessly with seamless calling and texting.
Need help? Contact our support team at [email protected]


